Richie's North/South Lengthways Bed

Anything and everything thing here
join a thread/start a thread
User avatar
Madmountainman
Posts: 278
Joined: June 29th, 2015, 3:32 pm

Richie's North/South Lengthways Bed

Post: # 16945Post Madmountainman
February 20th, 2017, 7:15 pm

Having cogitated, prevaricated, asked questions and thought about it... then cogitated some more, i've finally cracked on with my lengthways bed conversion.

I've taken a few photo's and will post them here, along with a little description, in order that you may see what i've done. You are then welcome to copy, or modify, what i've done to achieve something similar for yourself.

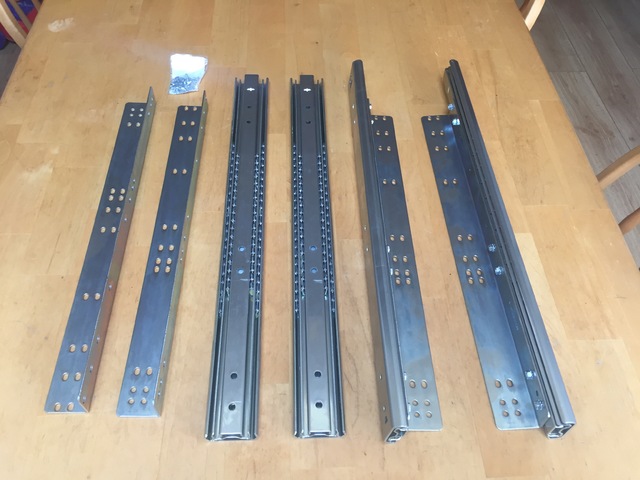
Along with a few tools, screws and some really strong grab adhesive, you'll also need some drawer slides and some new, stronger, battens for the bed frame to sit on. I had a mate knock up some 1530mm L x 55mm H x 32mm W timber battens. The slides are 53mm high, hence needing to put higher, 55mm battens in compared to the original 40mm ones.

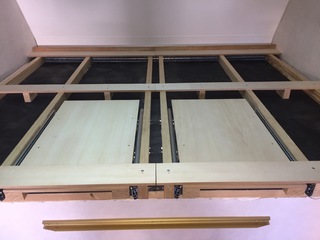
I bought my drawer slides from Solmer, as they had the best price. I bought some Accuride 5321, 550mm, 150kg rated slides, and I also bought the extra mounting brackets to make attaching the base board and new from trim board a bit easier. You can do it without the brackets and probably get a lower weight rated slide, but i've gone for the belt and braces approach,

http://www.solmer.co.uk/groove-side-mou ... nners.html
http://www.solmer.co.uk/groove-side-mou ... ckets.html

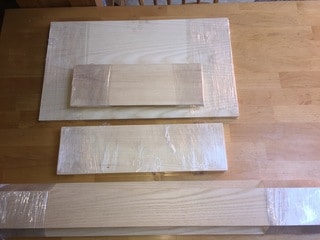
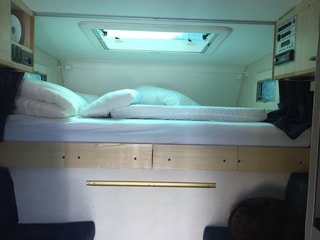
First off, once you've removed the mattresses, you'll be faced with this.

Image

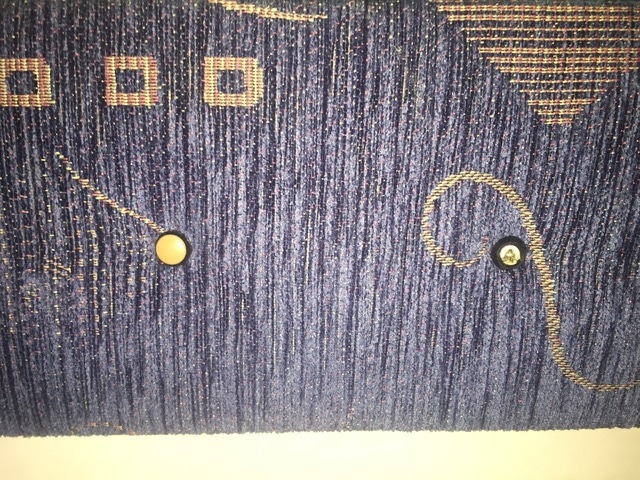
See those little brown caps? They're decorative covers for the screws that attach the front trim board to the bed frame. To remove these, prise off the caps with your finger nail, or a pick. They're held on with a little blob of glue, which is a right bugger to get out of the pozidrive screw heads in order to remove the screws.

Image

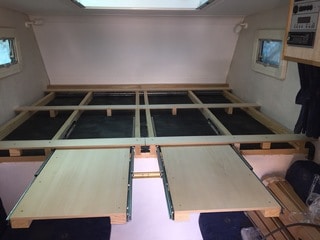
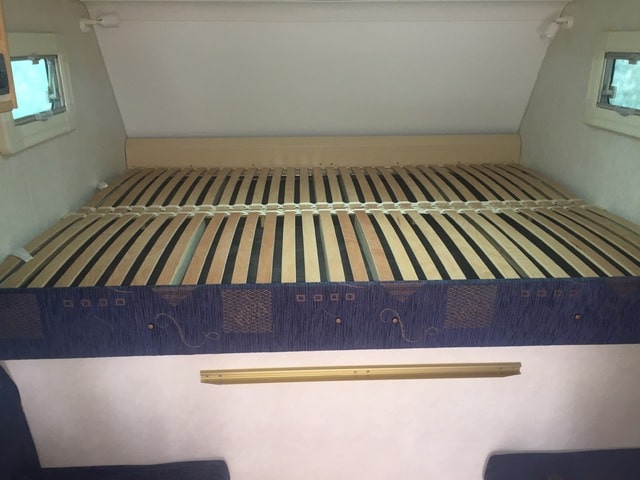
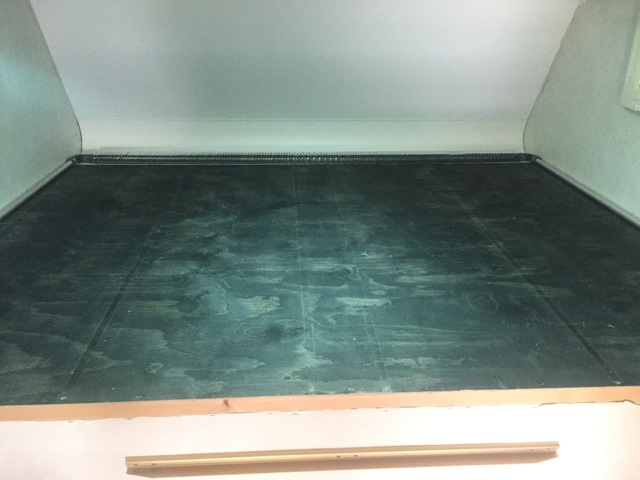
Once you have the front board off you'll see this. These are the plywood rails the bed frame is mounted on. They're both too low, at 40mm, and not strong enough to attach the drawer slides, so they need to be removed.

Image

Start unscrewing all the screws you can find that attach the bed frame to the support rails, and also remove the metal heater guard, and you'll end up with two plywood frames.

Image

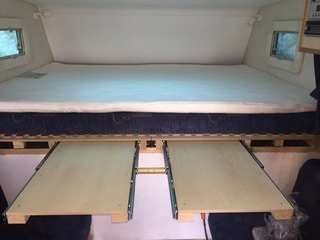
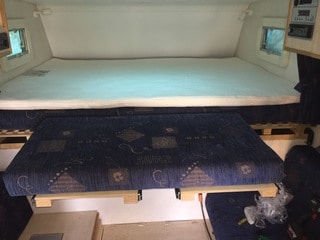
Remove these frames intact, you'll see why shortly. Once removed you'll end up with this.

Image

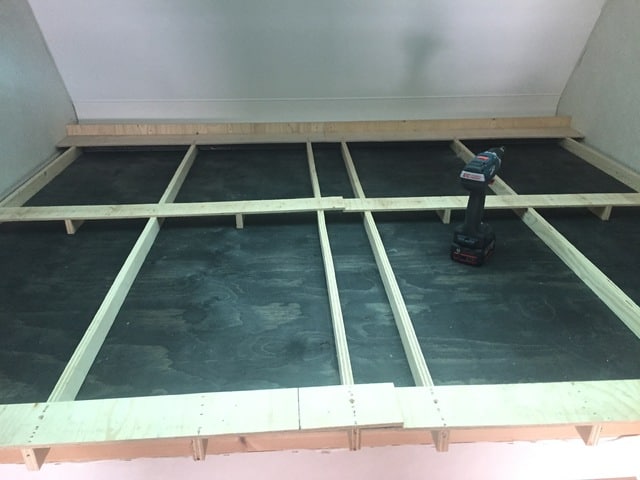
Now, using the original frames, measure your new battens and note where the existing screw holes are.
Drill new holes in your new battens, in the same places as the old ones, then add a third hole in the middle of each batten, finishing off each hole with a countersink.
Then, using the original frame as a template, line up and mark where your new battens go.
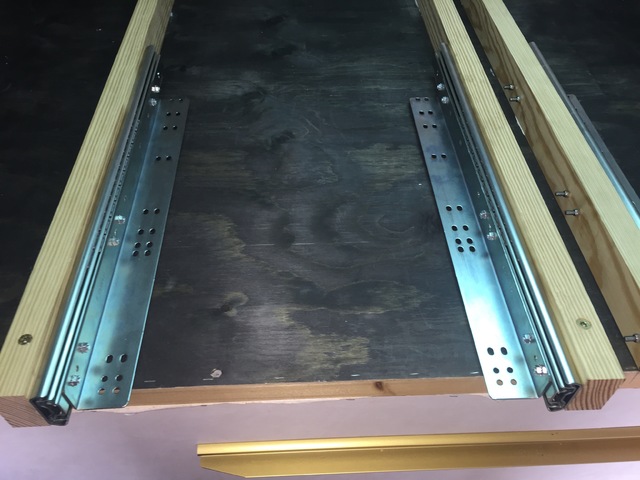
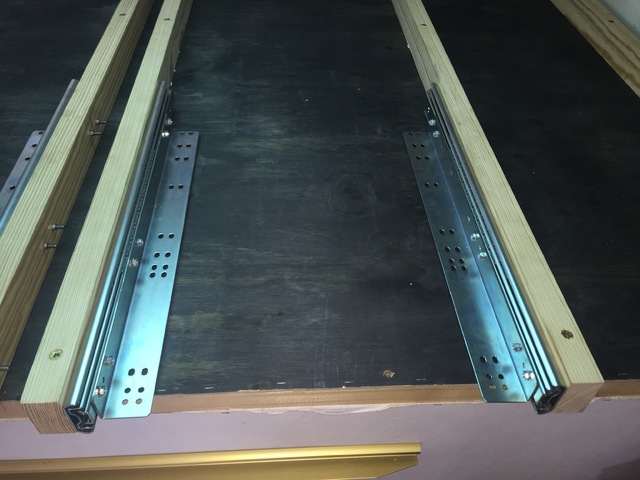
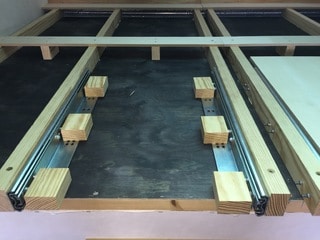
Attach the outer two battens using six, 6mm x 70mm, torx, countersunk screws. Once these outer battens are in place, your original frame work can be used to help secure the remaining battens.
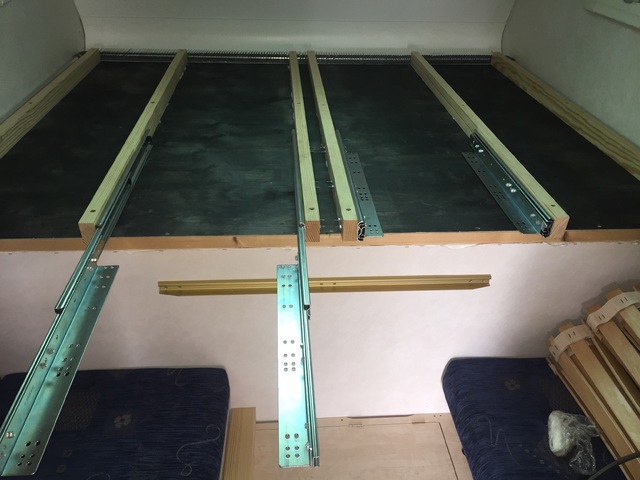
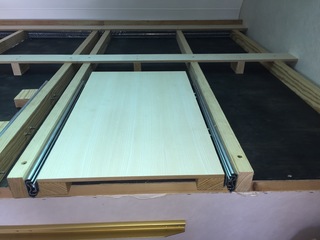
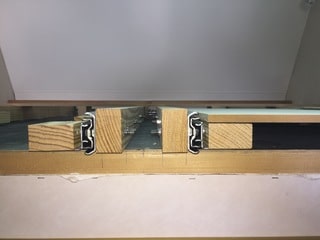
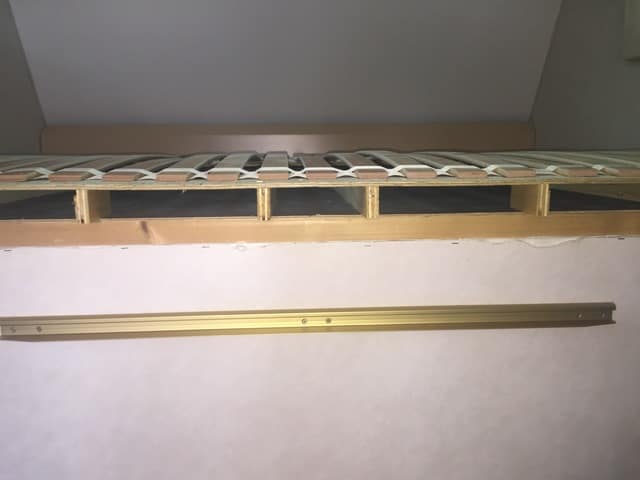
These four battens will be the bearers for the slides, so will require grab adhesive as well as the three screws, to attach them to your camper and ensure they don't come apart when leverage is applied to the slide-outs.

Image

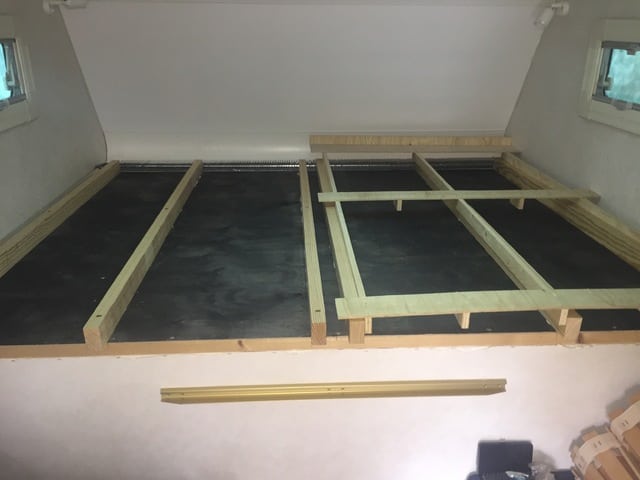
That's as far as i've got today, more later once the grab adhesive has cured.

earthman
Posts: 140
Joined: April 22nd, 2015, 2:26 pm

Re: Richie's North/South Lengthways Bed

Post: # 16959Post earthman
February 21st, 2017, 10:52 am

Looking good, can't wait to see it finished.

North/South beds certainly seem to be in the minority in general, I can't understand why because surely it's the best option for any couple at the end of the day?

User avatar
Alexd
Posts: 1097
Joined: October 20th, 2015, 9:44 pm
Location: home again home again!
Contact:

Re: Richie's North/South Lengthways Bed

Post: # 16999Post Alexd
February 23rd, 2017, 9:21 pm

these are 'drawers' but really shallow aren't they?

User avatar
Madmountainman
Posts: 278
Joined: June 29th, 2015, 3:32 pm

Re: Richie's North/South Lengthways Bed

Post: # 17072Post Madmountainman
March 2nd, 2017, 6:41 pm

Ok, been busy the last few days, but have now fitted the drawer slides. In response to the previous post, yes, they are drawers, but they're only as deep as the slides themselves, as all they need to do is hold a piece of ply board, on which will sit one of my seat cushions. This saves me having to make up two more cushions and carry them.

These are the drawer slides. On the left are the slides and the mounting brackets. On the right are the brackets attached. You can use some wood as a support for the ply bases, but I went for the brackets. I fixed them to the runners with stainless 5mm Countersunk Screws, with Nylocks, but you can use M6 Euro Screws.

Image

Slides fixed to the runners, left side.

Image

Slides fixed to the runners, right side.

Image

Last one, showing the slides extended on the left side. With both slides out, they're a perfect fit for one of the seat cushion bases, but you could make up two singles and choose to have one side out only, if your other half fits ok without it. That way, it makes it even easier to climb in and out of bed.

Image

Next up will be the sheet material. I found a local supplier that will cut me a sheet of Ash Veneered Ply, which will make the trim panels, the bases and the rails that support the sprung slats. The Ash is close enough in colour to the original furniture fitment for my liking, and I can always cover it with material if I change my mind. They should have my little order done in a week or so.

User avatar
zildjian
Site Admin
Posts: 22197
Joined: September 8th, 2013, 3:30 pm

Re: Richie's North/South Lengthways Bed

Post: # 17076Post zildjian
March 2nd, 2017, 7:23 pm

that looks neat, I was admiring 'truckcampers' layout in June last year at Devon and wondering like you if to do it or not,
I have a set of made up cushion supports to try first see if we like that layout then probably copy whats now becoming almost standard amongst our lot

User avatar
Madmountainman
Posts: 278
Joined: June 29th, 2015, 3:32 pm

Re: Richie's North/South Lengthways Bed

Post: # 17077Post Madmountainman
March 2nd, 2017, 7:37 pm

I wanted the benefit of Tischer's solution, in that you can get jiggy with the missus as both of you have support in the middle of the bed. However, their solution is a full width fold up contraption that requires a reinforced front bulkhead, so I needed a drawer slide. S.Karosser's solution is good, but you have to sleep apart to use the extra supports. I reckon their slides don't have the weight rating, which is why their solution allows you to get in and out of bed without putting all your weight on the slide out section.
I found that the standard spacing of the support rails was a perfect match for the width of the seat cushion, which allows a bit of space to step down onto the seating area when getting in/out of bed. It also allows for an even spacing of the support rails for the sprung slats. It's down to personal choice at the end of the day, just give it time and plenty of thought before you settle on which slide position's best for you.
If you're not massively tall, like me, you could easily get away with shorter drawer slides and a narrower cushion. My conversion's even longer than my bed at home!

User avatar
zildjian
Site Admin
Posts: 22197
Joined: September 8th, 2013, 3:30 pm

Re: Richie's North/South Lengthways Bed

Post: # 17079Post zildjian
March 2nd, 2017, 9:01 pm

We'll check out the finished item next time I don't think I need the cushions the depth they came out at
but they're all done now 'so deal with it'

Poppi made them up from same material as rest of upholstery and they look & feel great looking forward to checking out if it works over the Summer

User avatar
Madmountainman
Posts: 278
Joined: June 29th, 2015, 3:32 pm

Re: Richie's North/South Lengthways Bed

Post: # 17752Post Madmountainman
May 10th, 2017, 3:49 pm

Ok, the house has been keeping me rather busy, but i've finally finished off the bed conversion. Here's a few more shots.

First off, I popped down to Beech Brothers in Exeter and picked up my wood veneer, which they'd cut to size for me.

Image

I then cut some noggins and attached them to the slide runners...

Image

and fitted the bases for the cushion.

Image

You can see there's just sufficient clearance for the drawers.

Image

The next few show the finished drawers.

Image

Image

Image

Here we are, with the mattress pads back in situ...

Image

and voilà, the drawers miraculously appear. :D

Image

With one of the seat cushions in place...

Image

and finally, with the trim boards in place and my extra mattress topper to bring the levels to the same height.

Image

Being really fussy, the only thing i'd do differently would be to add a couple of extra noggins to attach the fixed ends of the trim boards, as the screw spacing is determined by where your support rails are. Overall though, i'm rather chuffed.

User avatar
zildjian
Site Admin
Posts: 22197
Joined: September 8th, 2013, 3:30 pm

Re: Richie's North/South Lengthways Bed

Post: # 17754Post zildjian
May 10th, 2017, 5:35 pm

Another nice conversion to this sleeper I expect to be copying both of you in how you've done this probably over next Winter

User avatar
Madmountainman
Posts: 278
Joined: June 29th, 2015, 3:32 pm

Re: Richie's North/South Lengthways Bed

Post: # 17755Post Madmountainman
May 10th, 2017, 8:18 pm

zildjian wrote:Another nice conversion to this sleeper I expect to be copying both of you in how you've done this probably over next Winter

It comes down to personal preference. You either have two slides/flip ups at each side of the bed and enter from the centre or, if you enjoy cuddling up with your wife/partner, you have a centrally fitted extension. The latter's not quite as easy to get into bed, space-wise, but you can use the seats to step up. That's why I used the heavy duty slides, as I don't need to worry if Sandy's not too careful climbing in/out of bed, as they're designed to take the strain. Also, doubling up the slides spreads the load and increases the strength over having just one slide out with two slides supporting the load instead of the four i've fitted.
Lying in bed is really good now. Each of us have a window to the side and the whole camper feels more spacious as you look out along the camper's length, and not the side wall.
Given how long demountable have been in production, it seems odd that it's taken until recently for the likes of Tischer and S.Karosser to get their acts together and offer the N/S sleeper in their campers.

Post Reply