Suspension: Load Plus helper springs
Posted: May 28th, 2021, 6:49 pm
Our current demountable (an old Dutch-built Rhino Safari) is pretty light and rides reasonably well on our double cab Ranger without any supplementary suspension. There's very little sideways rolling on roundabouts or sharp bends but it does have an occasional tendency to 'porpoise' on the straight if we happen to hit the wrong combination of road surface and road speed. A change in speed soon remedies the effect but it's a bit of a pain nonetheless.
I fitted air-assisted suspension (Firestone Ride-Rite) to our previous Ranger, which carried a much heavier Leisure Camper EC8L, so I appreciate its benefits but I've been doubtful that I could justify its cost on our current setup given that the ride is really not bad and we use this camper less than we used to. But, while ordering other parts, I noticed that euro4x4parts.com were offering Ironman Load Plus helper springs for 195.00 euros - not exactly giving them away but a snip compared with the price of an air kit (718.00 - 1440.00€ depending on how many bells and whistles you want). So I figured for 195.00€ I'd give it a go.
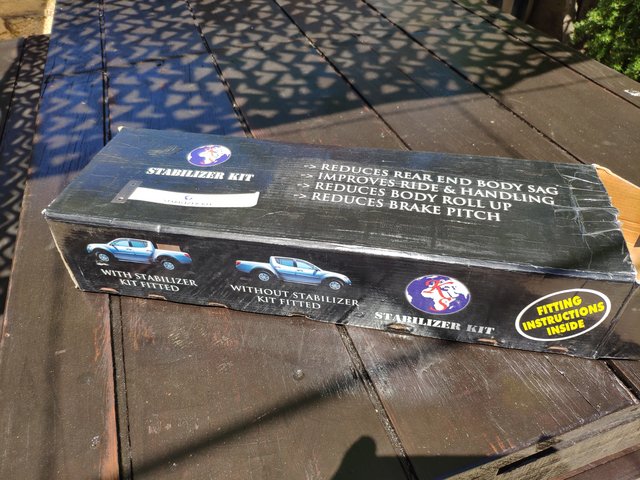
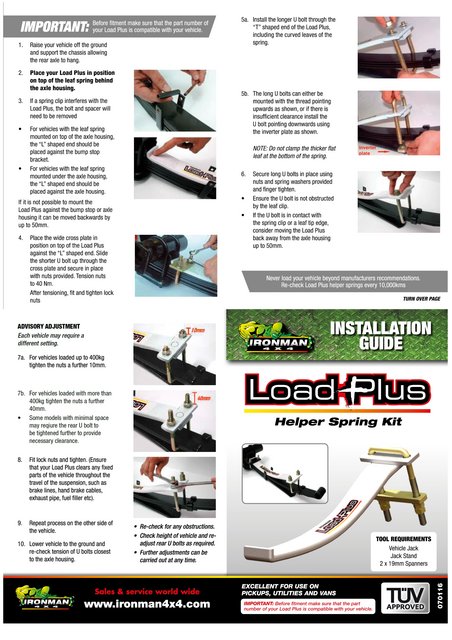
Not surprisingly the 4kg package made lots of claims such as "reduces rear end body sag" (at my age I should be so lucky! ), and offered assurance that fitting instructions were inside. That wasn't true in the case of my delivery but the very straightforward instructions, which only amount to a couple of illustrated pages, are easily available online on the Ironman4x4 website (https://ironman4x4.com/fitting-instruct ... /load-plus).
You might notice that the instructions request that you "make sure that the part number of your Load Plus is compatible with your vehicle". That's easier said than done. There is an application chart on the Ironman site (https://ironman4x4.com/category-product ... /load-plus) but that's not particularly helpful unless you have an American model pickup. It's doubly confusing because you may notice that it lists an LP3 kit for the Ranger "(Not USA model)", but an LP4 kit for the Mazda BT50. Surely they are essentially the same pickup? Anyway, luckily for me europarts4x4.com took the guesswork out of it by offering model-specific search filters. So I got the right kit but I'm afraid I still can't tell you which one it is! If it helps, the Ironman part number is 0079289.
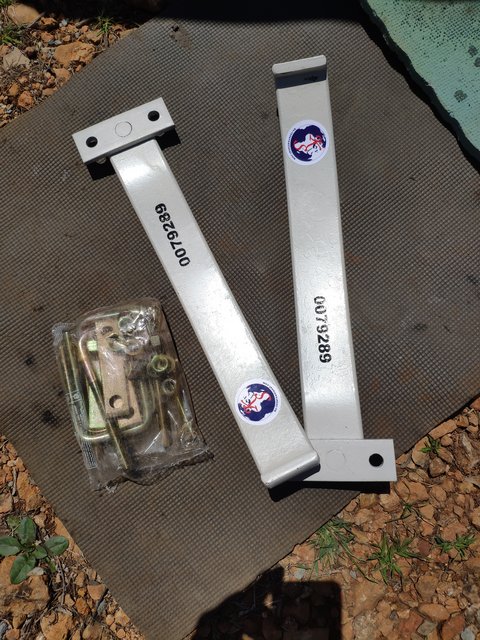
You may not get any instructions but this is what you DO get in the box - 2 hefty helper springs and a bag of bits.
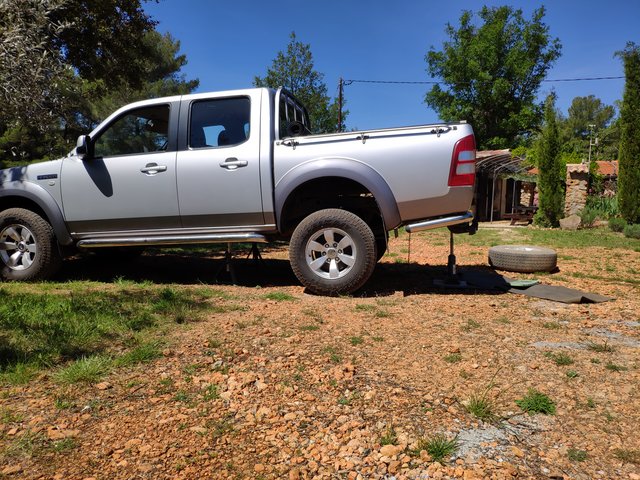
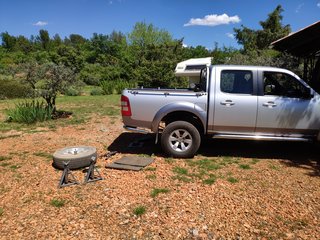
First step is to get the back end of the pickup chassis jacked up. This needs a high lift jack because it's necessary to lift the chassis but to leave the axle hanging on the suspension. There was no indication one way or the other in the instructions but I decided not to bother removing the wheels. It just seemed like unnecessary hassle and there's plenty of room to work under the back end once the spare is removed and the chassis is jacked up - and supported on axle stands of course.
The helper spring goes behind the rear axle with its front end butted up either against the bump stop, where the axle is below the rear springs, or against the axle housing if the axle is above the rear springs. The helper's front end is clamped down onto the leaf spring with one of the smaller u-bolts and crossplates from the fitting kit and secured in place with washers, nuts and locknuts.
So far so simple, but here's A TIP to save you having to fix it and then unfix it as I had to do: the rear u-bolt can be installed either way up, i.e. with the threads pointing upwards through the crossplate that's fixed to the top of the Load Plus, or with the threads pointing down and fixed through the inverter plate below the leaf spring. The choice may be determined by necessity, in order to avoid potential conflict between the Load Plus fittings and brake lines for example, or it may simply be a matter of preference. In my case it was preference, for reasons which I'll explain later, but I soon discovered that, once the front end of the Load Plus is clamped down with the small u-bolt, there isn't room between the rear end of it and the chassis to be able to put the larger u-bolt into position from above. Doh! It should have been pretty obvious really. Fortunately it was very simple just to loosen off the front end, put the rear u-bolt through the helper's crossplate at the rear end (as in the last pic), and then clamp up the front end again.
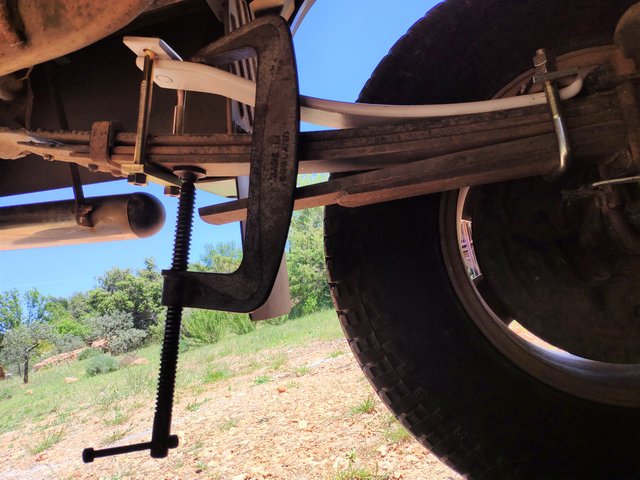
Fixing the rear u-bolt with the inverter plate below the leaf spring leaves very little exposed thread, certainly too little for the nuts to catch once the spring washers are in place, so I found it necessary to compress the Load Plus slightly. I used a G-clamp, which was very simple, but a bit of wood wedged between the chassis and the helper spring would be just as good and you can always get it out again once the u-bolt's been tightened up a bit.
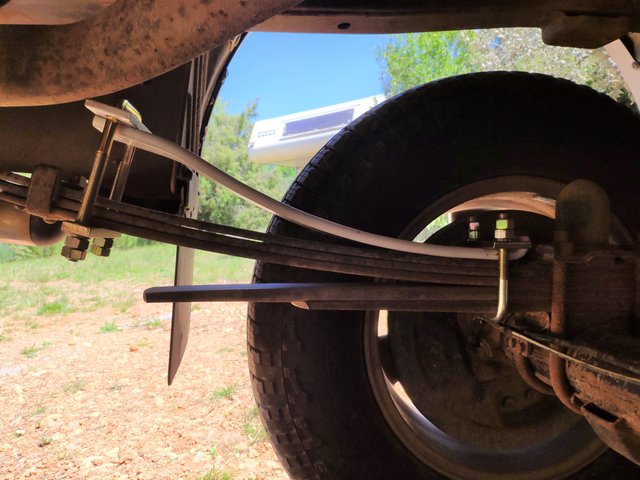
The whole idea of these helper springs is that they are adjustable. I want to be able to crank them up when I put the camper on but I don't want the pickup suspension to be any harder in normal use. For that reason I tightened the nuts on the rear u-bolt just far enough to get the lock nuts on securely. In that position, with the jack and the axle stands removed, the back end of the unloaded pickup sits at just about the same height as before and the ride is unchanged ...
... but before putting the camper on I'll wind those nuts up an extra 40mm, or so, as per the instructions.
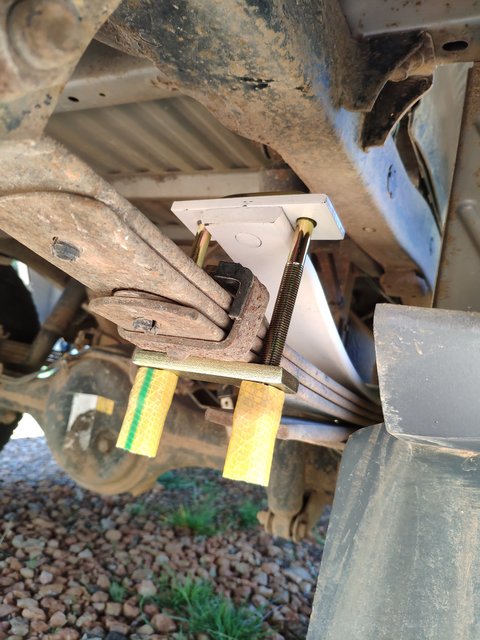
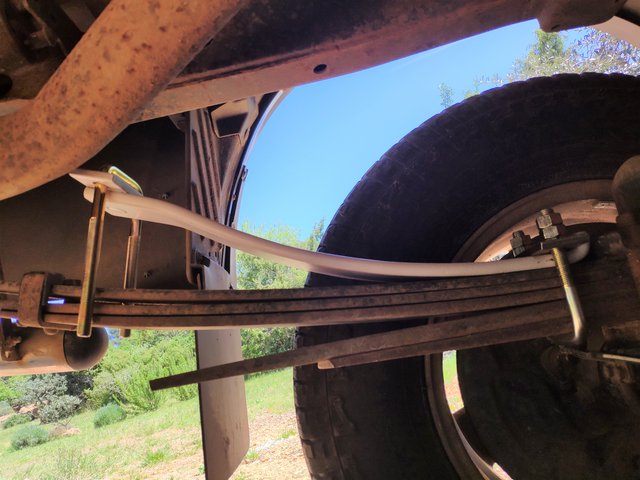
It's because I want to be able to adjust the Load Plus springs with as little hassle as possible that I fitted the rear u-bolts with their threads downwards. In this position the nuts and locknuts are very easily accessible under the pickup bed just behind the rear wheels. Finally, I've pushed a short section of hose over the nuts to keep out the worst of road dirt and ensure that they remain easy to adjust.
All being well we'll be getting away for a bit in the second half of next month so, for anyone interested, I'll follow up with a post on how it's all performed
I fitted air-assisted suspension (Firestone Ride-Rite) to our previous Ranger, which carried a much heavier Leisure Camper EC8L, so I appreciate its benefits but I've been doubtful that I could justify its cost on our current setup given that the ride is really not bad and we use this camper less than we used to. But, while ordering other parts, I noticed that euro4x4parts.com were offering Ironman Load Plus helper springs for 195.00 euros - not exactly giving them away but a snip compared with the price of an air kit (718.00 - 1440.00€ depending on how many bells and whistles you want). So I figured for 195.00€ I'd give it a go.
Not surprisingly the 4kg package made lots of claims such as "reduces rear end body sag" (at my age I should be so lucky!
You might notice that the instructions request that you "make sure that the part number of your Load Plus is compatible with your vehicle". That's easier said than done. There is an application chart on the Ironman site (https://ironman4x4.com/category-product ... /load-plus) but that's not particularly helpful unless you have an American model pickup. It's doubly confusing because you may notice that it lists an LP3 kit for the Ranger "(Not USA model)", but an LP4 kit for the Mazda BT50. Surely they are essentially the same pickup? Anyway, luckily for me europarts4x4.com took the guesswork out of it by offering model-specific search filters. So I got the right kit but I'm afraid I still can't tell you which one it is! If it helps, the Ironman part number is 0079289.
You may not get any instructions but this is what you DO get in the box - 2 hefty helper springs and a bag of bits.
First step is to get the back end of the pickup chassis jacked up. This needs a high lift jack because it's necessary to lift the chassis but to leave the axle hanging on the suspension. There was no indication one way or the other in the instructions but I decided not to bother removing the wheels. It just seemed like unnecessary hassle and there's plenty of room to work under the back end once the spare is removed and the chassis is jacked up - and supported on axle stands of course.
The helper spring goes behind the rear axle with its front end butted up either against the bump stop, where the axle is below the rear springs, or against the axle housing if the axle is above the rear springs. The helper's front end is clamped down onto the leaf spring with one of the smaller u-bolts and crossplates from the fitting kit and secured in place with washers, nuts and locknuts.
So far so simple, but here's A TIP to save you having to fix it and then unfix it as I had to do: the rear u-bolt can be installed either way up, i.e. with the threads pointing upwards through the crossplate that's fixed to the top of the Load Plus, or with the threads pointing down and fixed through the inverter plate below the leaf spring. The choice may be determined by necessity, in order to avoid potential conflict between the Load Plus fittings and brake lines for example, or it may simply be a matter of preference. In my case it was preference, for reasons which I'll explain later, but I soon discovered that, once the front end of the Load Plus is clamped down with the small u-bolt, there isn't room between the rear end of it and the chassis to be able to put the larger u-bolt into position from above. Doh!
Fixing the rear u-bolt with the inverter plate below the leaf spring leaves very little exposed thread, certainly too little for the nuts to catch once the spring washers are in place, so I found it necessary to compress the Load Plus slightly. I used a G-clamp, which was very simple, but a bit of wood wedged between the chassis and the helper spring would be just as good and you can always get it out again once the u-bolt's been tightened up a bit.
The whole idea of these helper springs is that they are adjustable. I want to be able to crank them up when I put the camper on but I don't want the pickup suspension to be any harder in normal use. For that reason I tightened the nuts on the rear u-bolt just far enough to get the lock nuts on securely. In that position, with the jack and the axle stands removed, the back end of the unloaded pickup sits at just about the same height as before and the ride is unchanged ...
... but before putting the camper on I'll wind those nuts up an extra 40mm, or so, as per the instructions.
It's because I want to be able to adjust the Load Plus springs with as little hassle as possible that I fitted the rear u-bolts with their threads downwards. In this position the nuts and locknuts are very easily accessible under the pickup bed just behind the rear wheels. Finally, I've pushed a short section of hose over the nuts to keep out the worst of road dirt and ensure that they remain easy to adjust.
All being well we'll be getting away for a bit in the second half of next month so, for anyone interested, I'll follow up with a post on how it's all performed

