Page 2 of 52
Re: SKarosser Copy Scratch Home build?????
Posted: June 11th, 2017, 12:38 pm
by zildjian
Mark, here is Bas Wit's build of a spaceframe camper
in Belgium
Re: SKarosser Copy Scratch Home build?????
Posted: June 11th, 2017, 6:51 pm
by derestrictor
There was a blog on this build once
Re: SKarosser Copy Scratch Home build?????
Posted: June 11th, 2017, 7:37 pm
by wonkywheel
Zildjian,
thanks for the link and the time you took to take me on the conducted tour of your stately home-mobile. Given me plenty more things to think about. Back to the Cad system.
Mark

Re: SKarosser Copy Scratch Home build?????
Posted: July 9th, 2017, 5:08 pm
by wonkywheel
Small Update
First I will try to transfer over the pictures from photobucket that now wants me to pay for 3rd party hosting

I'm not sure if I can, or how to edit the previous posts with dead links??
Finished cutting off the checker plate pieces.

Dragged it up to the truck and tried the fit

for the first time.

Not too bad at all

The tail gate support wires were always going to be a problem, and they were.

I either have to stand back by about 100mm from the truck cabin or fit packing underneath the camper to lift it about 75mm. My first thought is to fit a packer. I might be able to incorporate some water tanks underneath. That should keep the weight forward of the back axle and as low as I can get without fitting them under the truck bed. I will reserve judgement until I have the full height on the back with the cab over on.
I could take it off completely as Zildjian advised. That would indeed be quite a weight saving but at the minute I like the idea of a virtual extended bed for more stability

Took it out onto the fairly level street to see haw it sits.

The bottom of the step recess sits about 650mm of the road at the minute. That was with a 75mm block under the camper. Just give me a rough idea how many steps I will need.
I am quite pleased with the way its looking although I do intend to replace the two outside rails with some stronger rectangular box when it arrives.

My first impression is that I might get away without having to fit extended wing mirrors although before I can test that on the road I need to sort the turn buckle fixings and eye bolts out as well as either get a trailer light board or fit the lights to the back.
Re: SKarosser Copy Scratch Home build?????
Posted: July 9th, 2017, 5:44 pm
by zildjian
Jumped forward in recent weeks hasn't it, and its good to just check the footprint so it will fit in place before going any further,
as far as pictures go
as long as you have the originals you can just re-host them (free) and drop them back in place later when you have time
Re: SKarosser Copy Scratch Home build?????
Posted: July 9th, 2017, 6:17 pm
by wonkywheel
Thank Zildjian.
Just trying to find the original photo's on my computer.
I know they are there it's finding them again. I can't get at them at all on Photobucket

Have found the EDIT button Too
Re: SKarosser Copy Scratch Home build?????
Posted: July 9th, 2017, 9:23 pm
by wonkywheel
Re: SKarosser Copy Scratch Home build?????
Posted: July 12th, 2017, 8:24 pm
by Alexd
Not only you suffering with Photobucket right now,
my own website and many many others have subjects riddled with blank images where PB have ceased hosting them
sooner they go broke the better i reckon
Re: SKarosser Copy Scratch Home build?????
Posted: July 12th, 2017, 9:23 pm
by wonkywheel
Yes I agree.
Such a shame when you lose so much information.
The same thing happened with the teardrop forum. Admin made the decision to close the forum? I even offered to buy it off him but all the information was deleted

Re: SKarosser Copy Scratch Home build?????
Posted: July 30th, 2017, 8:13 pm
by wonkywheel
A little Update
Finally managed to get the next Aluminium box section home from work, where it was delivered to. It's a bit of a handfull because I ordered 5 metre lengths, which is just about the length of the truck.
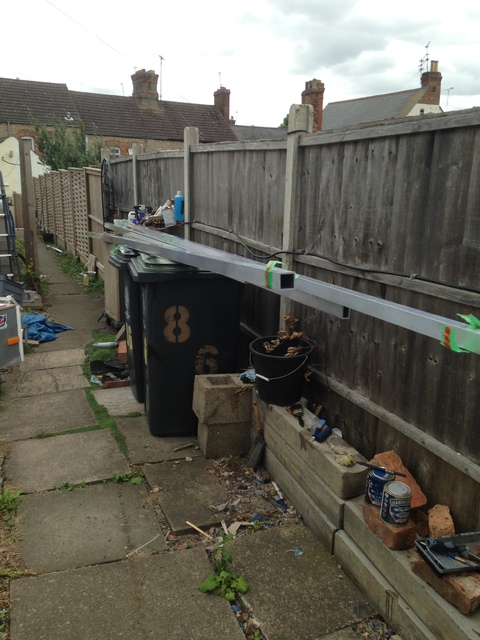
I had the rectangular box 2"x1"x10swg to replace some of the 1"x1"x16swg which was not man enough for the job. Some more 3/4x 3/3x16swg angle for the edgings as the previous batch has all been cut up to fit.
I have also stuck my neck out and am going to attempt to build my own lifting jacks

With this in mind I have had 2"x2"x3/16" box delivered for the outer casing with 40mmx40mmx3mm box for the inner. This combination gives just under 1mm total clearance (0.5mm per side) for gease and free movement.
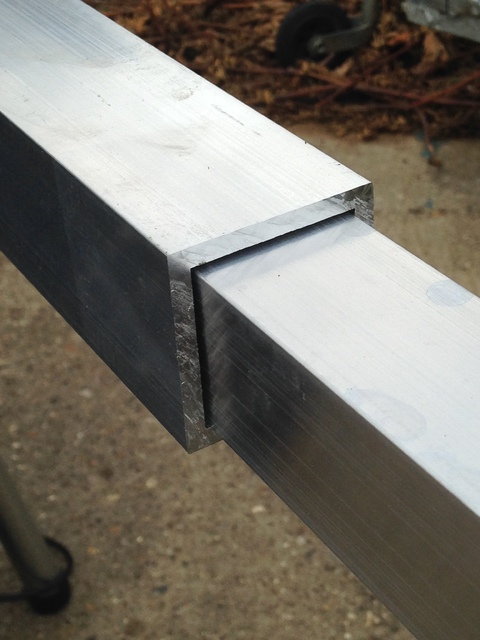
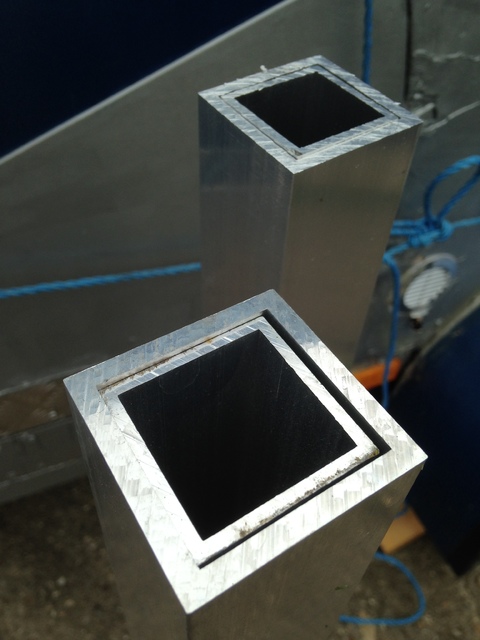
I am working on the therory that with the inner and outer at about the ame length and an actual movement of about 400mm max the play will be virtually un-noticable.
The rest of the 2x1 was all cut up ready to drill and fit.
I made modifications to the roof frame work. To allow for a small 280mmx280mm opening vent in what will be the toilet/shower room
This was after seeing Richards camper and being advised it would be a good idea. Well the frame works in now so I can fit one as and when I get one
Most of the work was to cut all the spars for the top half of the camper. This should allow me to weld/glue/nail
together the bottom half and the top half separatly then fix all together last. This makes it a bit more managable.


